| Cabinet or part | What the guide covers |
|---|---|
| Single door base (full height) | Parts list, Invisa-lock assembly, legs, shelf, hinges, bumpers |
| Side burner or grill base, 1, 2 and 4 door | Assembly of the grill cabinet |
| Ceramic smoker or grill pedestal, 2 door | Assembly of the pedestal cabinet |
| Wall cabinet, 1 and 2 door | Parts list, shelf clips, hinges, assembly |
| Universal concealed corner | Corner cabinet assembly |
| Refrigerator panel | Base filler panel, stiles and support rails |
| Toe-kick, filler, finished panel, vent cover | Cutting, clipping and fastening |
| Propane pull-out, roll-out tray, wastebasket pull-out | Accessory mounting |
What comes with an Endura RTA cabinet?
An Endura RTA cabinet ships as panels and hardware that you assemble with an Invisa-lock connection, then install on adjustable stainless steel legs. Each cabinet type has its own assembly sheet with a parts list. This guide follows those sheets and the Endura installation guide only.
RTA means ready to assemble. The Endura RTA page lists a sheet and an assembly video for each cabinet. Use the sheet for your exact cabinet, because part letters and screw counts change.
The single door base cabinet sheet lists these parts: left and right sides, base bottom, base back, an adjustable shelf, a base front rail and a door. The two door wall cabinet sheet lists left and right sides, a bottom, a back, two shelves, a top and two doors. Count your parts against the sheet first.
What hardware is in the bag?
The installation guide says each cabinet includes a hardware bag with the hinge mounting screws and two or more cabinet leg assembly kits. The base cabinet sheet lists these items for a single door base:
| Item | Quantity on the sheet | Used for |
|---|---|---|
| Door and drawer bumpers | 2 | Upper and lower interior of the door, opposite the hinge |
| Standard stainless steel hinge and plate | 3 | Door hanging. The plate is detachable for easy door removal |
| Stainless steel leg and installation plate | 4 | Leg kit. A six-leg cabinet puts the center plate toward the middle |
| #6 x 1 3/4 in. stainless screw | 3 | Assembly of cabinet parts |
| #6 x 5/8 in. stainless pan head screw | 2 | Rail stops behind the top rails |
| #8 x 5/8 in. stainless flat head screw | 18 | Hinge installation |
| #12 x 5/8 in. stainless pan head screw | 16 | Leg plates to the bottom shelf |
Check the packing list first. If something is missing, the guide says to contact your authorized dealer or Innovation Cabinetry at 888.206.1088.
What tools do you need?
You need a drill, a Phillips screwdriver and a dead-blow hammer to assemble the cabinets. To install them you also need levels, shims, clamps, a saw and drill bits. The Endura guides list each tool, and the installation guide gives the drill bit sizes.
| Tool | Use |
|---|---|
| Drill with 3/16 in. wood bit | Pilot holes in cabinet backs or installation rails |
| Drill with 1/8 in. wood bit | Pilot holes in cabinet sides to join them together |
| Concrete bits | Concrete, if applicable |
| 2 ft and 4 ft levels | Checking each cabinet |
| Plastic shims | Leveling, if necessary |
| Clamps with rubber pads | Holding cabinets together before fastening |
| Saw (jig, circular, table or hole) | Trimming end panels, toe-kick and fillers |
| Tape measure | Fitting |
| Dead-blow hammer | Tapping Invisa-lock joints into the locked position |
Wear safety glasses, gloves, hearing protection and closed-toe shoes. Turn off any electrical, water and gas supplies the work affects.
How do you assemble an Endura cabinet?
Follow the sheet for your cabinet, and lock the Invisa-lock joints only when the sheet tells you to. The sheets give three general techniques: face the larger offset of the connector to the outside, keep every panel flush, and tap parts home with a dead-blow hammer at the end.
Here is the order shown on the single door base cabinet sheet.
- Lay out the panels and fit the connectors. The offset on each connector must face the outside of the cabinet.
- Keep the joints loose while you bring the panels together. The sheet warns not to fully engage the locking system until instructed.
- Check that all parts are aligned and flush. Then tap the parts into the locked position with a dead-blow hammer. The sheet shows the tap order: part C forward, part D down, part F forward.
- Drive the assembly screws shown on the sheet. These include the #6 x 5/8 in. rail-stop screws and the #6 x 1 3/4 in. screws.
- Fasten the leg plates to the bottom shelf with the sixteen #12 x 5/8 in. screws.
- Install the shelf clips at the height you want. Insert the shelf and snap it into place to lock.
- Attach the hinges to the door and hang it. Put the screws in the oblong holes first. After final adjustment, add two more screws in the round holes.
- Fit the bumpers on the inside of the door.
The equipment list says to use only the back slotted holes of the hinge plate until the cabinets are installed level and the door alignment is done.
Wall, corner and refrigerator panel cabinets
The wall cabinet sheets follow the same Invisa-lock method with a top panel, shelves, 10 shelf clips for the two door size, six hinges and 36 #8 x 5/8 in. screws. The refrigerator panel sheet lists a base filler panel, two base stiles and two support rails, and calls for a drill with a 3/16 in. wood bit. Use each sheet as written, and ask your dealer about any step it does not show.
How do you install the legs and level the first cabinet?
Fit the legs with the cabinet on its back on a soft surface, set them to about 4 1/2 inches, then place the first cabinet at the highest point of the site and level it. The first cabinet sets the height and the level for every base cabinet after it. Use a level in all directions.
Fit the legs
The installation guide gives this order for the adjustable legs:
- Place the cabinet on a soft surface with the door facing up.
- Position the leg plates over the pilot holes with the flange facing the outside of the cabinet. For more than four legs, point the center leg flanges toward the center.
- Fasten the leg base plates with the screws provided and a drill set to minimum torque.
- Set the leg length to 4 1/2 inches. This gives a nominal cabinet height of 34 1/2 inches. Screw the legs into the base plates.
- Do not tilt the base upward into position. The legs hold vertical weight, and tilting can break them. Lift the cabinet to clear the legs, rotate it, and set it down on all four legs.
Find the high point
The guide says to check the floor pitch side to side and front to back. Always begin at the highest point of the site. Set a reference line 34 1/2 inches above that point, then snap a level chalk line on the wall at the height of the cabinet top. Turn the legs clockwise to lower the cabinet and counterclockwise to raise it.
Use a level at least 4 ft long on each cabinet. Check corner to corner, left to right and front to back. Each cabinet must be level, square and plumb.
How do you join the cabinets together?
Align the end panels flush at the top, bottom and front, clamp them tight, then drive outdoor-rated screws through pilot holes. Use stainless steel screws no smaller than #8 x 1 1/4 inches. The guide warns never to use drywall screws, nails or staples.
The installation guide gives these steps:
- Place the next cabinet next to the leveled one. Use the end panels to align them. The top and bottom edges of the end panels must line up front to back, and the front edges must be flush.
- Clamp the cabinets together at the top and along the sides. Make sure the end panels are clamped tightly at every attachment point.
- Mark the drilling depth on the bit with masking tape. Do not drill deeper than 1 1/4 inches, so you do not drill through both end panels.
- On the adjacent cabinet, drill three pilot holes along the front edge, where they are hidden above the drawer bridge or behind the hinge plates. Drive a #8 x 1 1/4 inch stainless steel screw into each.
- Drill a second set of holes 1 inch from the back panel, parallel to the front, and drive screws. Finish with screws into the center top and bottom panel.
- Use a countersink bit so the heads sit flush. The sequence is drill, countersink, insert the screw, tighten.
Avoid drilling into areas with drawer glides, hinges or connection fittings.
How do you install grill and side burner cabinets?
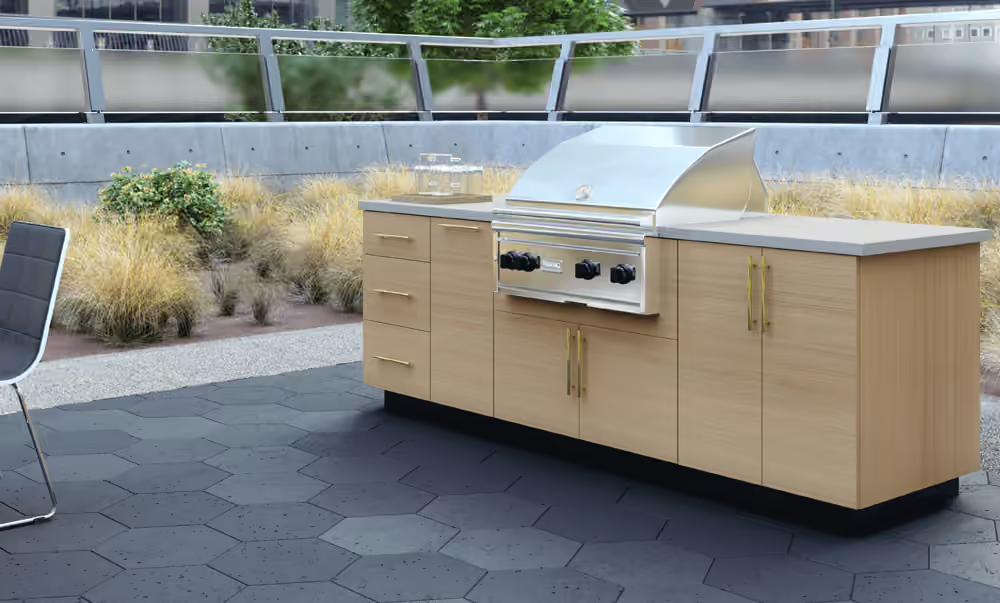
Remove the doors and false-front, set the legs to about 4 1/2 inches, join the grill cabinet to the run, then cut the false-front to match the grill or burner maker’s instructions. Always use an insulated grill jacket or liner, and have a licensed professional install gas appliances.
The installation guide lists these steps for side burners and grill bases:
- Remove and store the doors and false-front for easy installation.
- Lay the grill cabinet on its back, attach the legs, and set them to about 4 1/2 inches. Then stand it upright.
- Attach the grill cabinet to the run using the joining steps above.
- Cut the removable false-front according to the grill or burner maker’s instructions. Account for the countertop thickness. Snap it into position after cutting.
- Note that base grill cabinets have precut ventilation. The appliance maker or local code may require more, and extra openings can be cut in the field.
The guide includes a warning in capitals: always use grill insulated jackets or liners with Endura cabinetry to ensure proper insulation and safety. Read the grill maker’s manual for the jacket rules for your model. For the planning side, see how to plan an outdoor kitchen.
Cover the vents
Side ventilation openings are standard on all Endura base cabinets. The vent cover sheet gives four steps. Find the vent opening on the last cabinets in the run. Center the vent cover over it from inside the cabinet and predrill the mounting holes. Attach it with the six screws provided, tightening evenly without overtightening. Then check that it is secure and unobstructed. At least two vent covers are required. The sheet warns that uncovered openings may let debris, pests or small animals into the grill base.
How do you add toe-kick, fillers and panels?
Cut each part to size with a saw suited to wood and plastics, then attach it. A toe-kick clips to the legs. A filler sits flush with the front edge of the neighboring end panel. A decorative back panel is clamped, then screwed from inside the cabinet.
Toe-kick
The toe-kick sheet gives six steps. Cut the toe-kick to the length and height of the run. Place it on the ground in front of the cabinets. Take the clip plate and screws from the leg kit. Center the clip plate on the toe-kick, lined up with the legs. Slide the clip into the channel on the plate. Then tilt the toe-kick up, slide it back toward the cabinet, and press firmly until it engages.
You do not need a clip on every leg. The guide recommends a clip every 30 inches in long runs. It also notes you can omit toe-kicks to make cleaning easier, and that the stainless steel legs give a true furniture look.
Filler
Measure the space, trim the filler with a table saw or miter saw, and set it flush with the front edge of the neighboring end panel. Pre-drill pilot holes through the cabinet box into the filler. Fasten with #8 x 1 1/4 inch stainless pan-head screws from inside the cabinet. If grill cabinets sit against a wall, the guide uses a 3 inch by 30 inch filler cut into three 1 inch strips so the vents stay clear.
Finished or decorative back panel
Place the panel with the finished side out. With a second person, lift it into position, flush and square with the cabinet base. Hold it with trigger clamps. From inside the cabinet, drill three evenly spaced pilot holes along the top edge and drive one #8 x 1 1/4 inch stainless screw in each. Repeat along the bottom edge and the center edge. Keep fasteners within 1 inch of the edges so you miss the decorative groove.
How do you finish the countertop, accessories and hinges?
Have the countertop fabricated and installed by a professional. Fill the dog bone openings in the front cabinet rail with countertop adhesive such as Endura MightyTAC before you set it. Then add accessories, hang the doors, return the drawers and adjust the hinges last.
The guide says to complete the full installation first. That includes screwing the cabinets together, fitting the countertop, placing appliances, attaching doors, returning drawers and creating a level surface. Only then adjust doors and drawers.
Accessories
Endura RTA lists three pull-out accessories, each with its own sheet.
| Accessory | Notes from the sheet |
|---|---|
| Propane pull-out | Propane tank not included. Position it on the bottom shelf behind the ventilation slots and do not cover them |
| Roll-out tray | Four possible mounting positions, a maximum of three roll-out drawers. Only one of the two top positions can be used |
| Wastebasket pull-out | Wastebasket sold separately. Maximum size 35 QT |
Reinstall drawers and adjust hinges
To reinstall a drawer, align the glide with the slot inside the cabinet base. Lift the drawer slightly and insert the glides into the tracks on both sides. Pull the drawer lock at the rear from inside the cabinet, push the drawer in, release the lock and push it all the way in.
The Endura hinge adjustment guide says the hinges offer 6-way adjustment for both base and wall cabinets. Rotate the center cam screw for side gaps between doors. Loosen the cam screw to move a door up, and re-tighten to lower it. Loosen to decrease the door gap and re-tighten to increase it. Make each adjustment on both hinges. The guide’s hinge adjustment sheet shows each move.
How do you care for Endura cabinets after install?
Clean with a soap and water solution and a soft cotton cloth. The Endura care sheet lists acceptable cleaners, including hand washing liquid soap, glass cleaner and a 10 percent chlorine bleach dilution. It says to avoid chemical cleaners, sprays, hard scrubbers and abrasive products. A pressure washer may be used at up to 1500 PSI with a wide-angle nozzle held at least 8 inches away.
For hinges and optional soft-close glides, the sheet says to remove dust with a soft bristle brush and, if needed, to apply spray lubricant and open and close the door a few times. It cautions that open containers of caustic chemicals stored inside can corrode the hinges.
The Endura warranty sheet gives hinges and leveling legs a five year limited warranty, and the optional factory-installed metal drawer glides a two year limited warranty. The Endura brochure lists a limited lifetime warranty for the line. Read the warranty sheet itself for the terms.
Next step
Match your order to the guides on the Endura RTA page, and plan the run with the outdoor kitchen planning guide. To order Endura, find a dealer. Compare door styles on the Endura page first.
Frequently asked questions
How many people do I need to install Endura cabinets?
The Endura installation guide recommends at least two people, because cabinets are heavy. It also says licensed contractors or experienced cabinetry professionals should handle installation for best results. Never scoot or shove a cabinet into place on its legs.
What fasteners should I use to join Endura cabinets?
Use stainless steel or equivalent outdoor-rated fasteners no smaller than #8 x 1 1/4 inch for cabinet-to-cabinet joins. The guide says never to use drywall screws, nails or staples, and that unauthorized fasteners will void product warranties.
What height should an Endura base cabinet be?
The target is 34 1/2 inches before the countertop is installed. Set the legs to about 4 1/2 inches as a starting point, then level the first cabinet and use it as the reference for the rest of the base cabinets.
When do I adjust the doors and drawers?
Adjust them last. The guide says to finish installing every cabinet, join them, fit the countertop, place appliances, hang doors and return drawers first. Then use the 6-way hinge adjustments for side, elevation and door gap.
Do I need vent covers on my grill base cabinets?
Yes. Side ventilation openings are standard on all Endura base cabinets, and the final cabinets in a run must be fitted with vent covers. The vent cover sheet says at least two covers are required for installation.
Where do I get Endura RTA cabinets?
Through an authorized dealer. Innovation Cabinetry does not sell to homeowners directly. A dealer can confirm which cabinet guides match your order and can help you plan the run before it ships.
Terms on this page
Sources
- Innovation Cabinetry: Endura RTA installation guide (PDF)
- Innovation Cabinetry: Endura vent cover installation sheet (PDF)
- Innovation Cabinetry: Endura hinge adjustment guide (PDF)
- Innovation Cabinetry: Endura RTA cleaning and care guidelines (PDF)
Written by Innovation Cabinetry and checked against the sources above on October 29, 2026. Codes, standards and product details change, so check the linked page before you act.